Beta Uplink Series
BETA UPLINK SERIES PART 1: 5v5 Domination mode
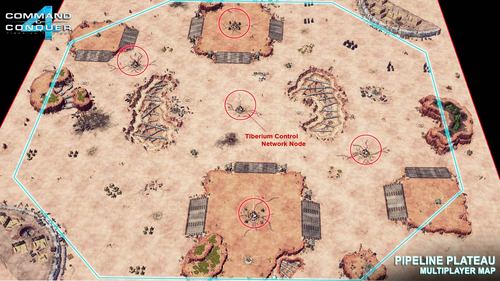
Command & Conquer 4 moves away from the traditional multiplayer mode to a new 5v5 Domination mode: GDI versus Nod. Two teams of players attempt to take control of five Tiberium Network Control Nodes scattered across the map, as well as neutral technological structures. To capture these points, you are given control ofa single mobile base known as the Crawler, which is capable of building all your units and structures whilst on the move and deploying them directly to the front lines.
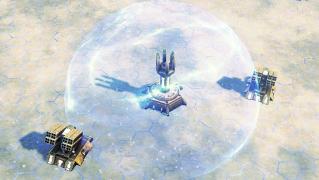
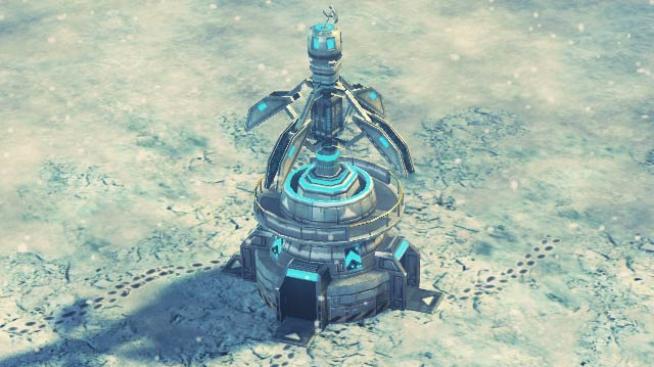
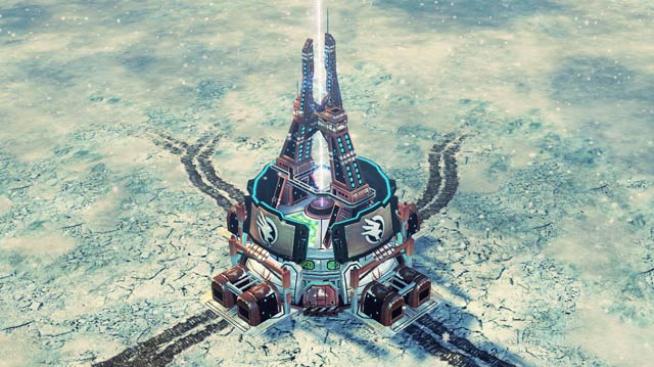 There are three classes per faction, each with their own vehicles and units – attack, defence and support. A note about your Crawler: it’s your mobile base, but don’t panic if you’re about to lose it. Losing your Crawler doesn’t mean the end of the battle for you; you can quickly deploy a new Crawler to your deployment zone, or to an Uplink tower you control. If the enemy is holed up in your deployment zone, crush them by sending your new Crawler straight at them!
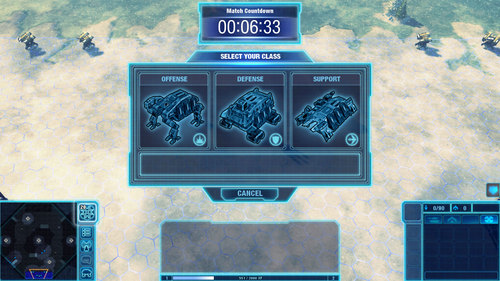
 Each class has its own strengths and weaknesses, but don’t worry about choosing the wrong class – you can quickly switch classes during a match to fill gaps in your team’s strategy, or to counter the enemy:
The Attack class is the standard C&C class featuring Heavy Tanks. This class excels at assault tactics and taking control of a region. Many classic C&C units are back in the Attack class, including the Mammoth Tank, the Stealth Tank, the Flame Tank, underground units, the Nod Cyborg Commando and loads of crazy new additions at Tech Level 3!
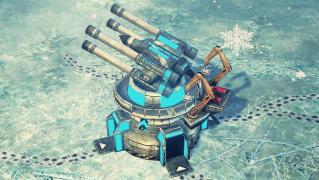
The Defence class excels at protecting Tiberium network nodes or chokepoints. The Defence class brings back certain aspects of classic C&C gameplay, allowing you to build structures such as defensive Turrets, Light Obelisks, and more. The Defence class also allows you to train GDI Zone infantry or Nod Cyborgs, and it is the only class to have access to the legendary Ion Cannon and the Temple of Nod.
 The Support class takes to the skies, allowing you to build air units such as the GDI Orca to move quickly and provide support to your teammates anywhere on the map. Throughout the battle, you have access to support abilities that can be used to aid your teammates and hinder your enemies. Don’t underestimate the Support class: GDI commanders can call in a Firehawk strike to bombard your Crawler, whilst Nod can hack your radar, spreading panic through misinformation amongst your entire team.
 The combination of these three classes on the battlefield provides more units for controlling the Tiberium Network than there have ever been in any C&C game. But the real question is, how are you going to win?
Capture one of the five TCN towers on the map. Control more TCN nodes than your opponent, and your team will start steadily earning points that will help you win the match. For example, if your team controls two nodes and the enemy controls just one, your team will start earning victory points.
Note, however, that you won’t earn victory points if your opponents have captured the same number of TCN nodes as you. Players must hold at least one more node than the opponent to start earning points. Finally, killing enemy units will also award your team two victory points. Make sure you use your units strategically, and do not waste them, as this would award victory points to the enemy, Commander.
 Upgrades also play an important role in the game, but we’re not quite ready to discuss them just yet.
UPLINK SERIES BETA PART 2: Attack Class
Each faction in C&C4 has three different classes to choose from. To win in 5v5 Domination mode, you must master the strengths and weaknesses of each class, and understand how they interact with one another. At the start of a match, you have 10 seconds to choose your starting position within the team in the control zone, see which class your teammates have chosen, and coordinate an attack plan. You can change class at any time by scuttling your Crawler. If you respawn, you’ll be able to keep any units from your previous class that remain on the battlefield. Each class has a specific playstyle – which class will suit you best? You’ll be well-equipped to answer that question over the coming weeks, with these previews of each class.
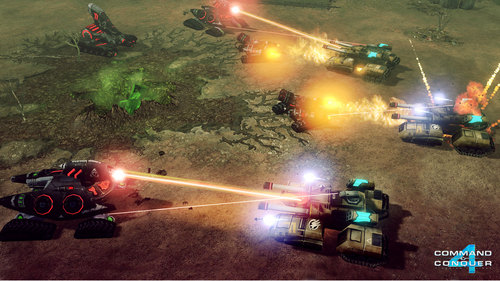
 Today, we’re taking a look at the Attack class. As an Attack class player, you are the backbone of your team, the classic tank power of C&C. This class is designed to break through enemy defences. The Attack class excels at capturing TCN nodes and driving enemy players out of these areas with overwhelming firepower. Although not as fast as the Support class, the GDI and Nod Attack classes feature units capable of scaling cliffs quickly, as well as fast and stealthy units.
BETA UPLINK SERIES PART 3: Defence Class
If you enjoy building structures, or staying back behind fortifications, then this class is for you!
Defence class players excel at protecting TCN nodes by placing defensive structures, shield generators and Pillboxes for their infantry. They can establish Tunnel Networks across the map to move quickly from one place to another, and are the only players with access to the legendary Ion Cannon and the Temple of Nod! Don’t be put off by the name: just because it’s called ‘Defence’ doesn’t mean you can’t play aggressively with this class. Even though the Defence class is slower and more heavily armoured, you can break through the front lines with an Attack-class player, set up turrets along the way, or even attack the enemy by deploying long-range artillery!
Tips for the Defence class:
¤ Defend your allies! You can build structures anywhere within the range of your Crawler or your teammates. When an ally deploys a Crawler near a TCN node, secure the area for them with Turrets. Set up a Tunnel Network in the area to move your infantry quickly, or build shield defences for your allies!
¤ Capture the Uplink Towers! You can build structures within the vicinity of an Uplink Tower, and your team can use it as a respawn point. The areas around Uplink Towers are excellent for your teammates to retreat to if they need to regroup.
¤ When building your defences, keep an eye on the counter – you’re limited in the number of structures you can build. Make sure you sell off defences that are no longer needed, and keep your Crawler alive! If your Crawler is destroyed, your defences will be offline until you “respawn”.
¤ You can force the enemy to retreat by slowly moving your tanks back towards your defensive structures.
¤ Don’t forget your infantry! Infantry is much more powerful in C&C4 thanks to advances in GDI armour and Nod’s cybernetic technology. As infantry can hardly be crushed by tanks, send them to the front line to tear the enemy to shreds, or station them in pillboxes.
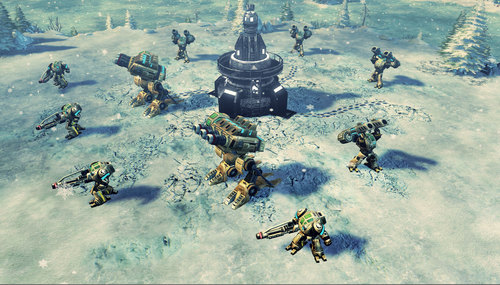 Zone Infantry
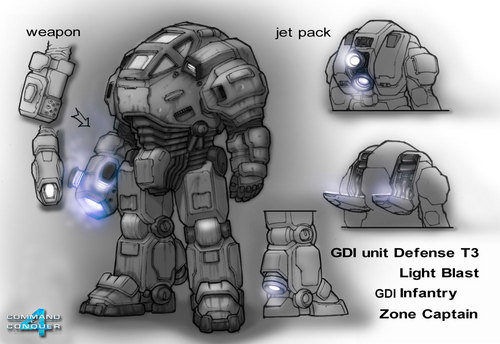
The GDI’s Zone infantry is actually a collection of units that use various weapons such as rocket launchers, portable cannons and Laser Turrets. Most Zone infantry units are capable of jumping, which substantially increases their movement speed, and the highest-ranking infantry, the Zone Captains, can even launch targeted Ion Cannon attacks!
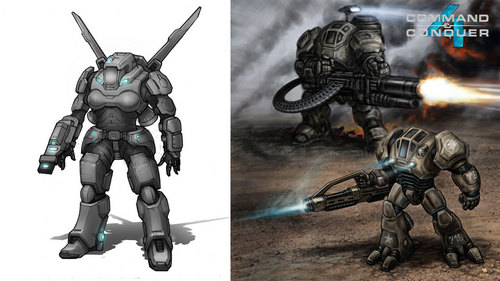 Falcon MRLS
The Falcon MRLS is the ultimate Scorpion Rocket – not only can it easily take down an aircraft, but it can also bombard an area with a barrage of missiles. Falcons can link up via the Patriot Missile System with other Falcons or Missile Turrets to fire at units normally out of their range.
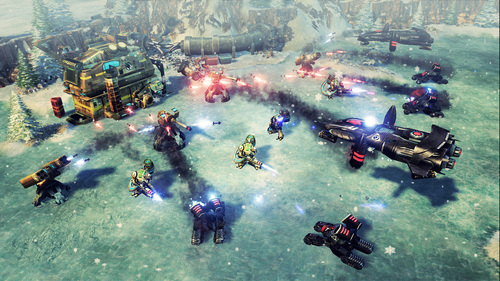 Juggernaut The Juggernaut is a mobile Artillery defence, capable of rapidly firing salvos of shells and withdrawing before the enemy can react. They can also be upgraded with ‘Sticky’ bombs – extremely powerful Land Mines that can be deployed in a distant area!Crystal Shield
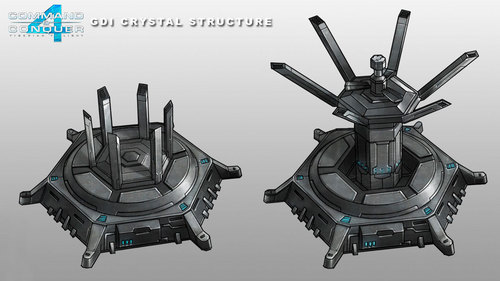
The Crystal Shield is the GDI’s most powerful defensive structure – designed to protect the most important locations, the energy shield created by this structure can protect a large number of units from long-range fire. The structure can also create a stasis field to temporarily shield units or halt the enemy’s advance.
 Rhino
The Rhino is the GDI’s basic Destroyer, the weapon of choice against other Defence-class players – its cannon is so powerful that it must anchor itself to the ground to fire. To protect itself in this mode, it constantly emits sonic waves, damaging enemy units around it and even underground units!
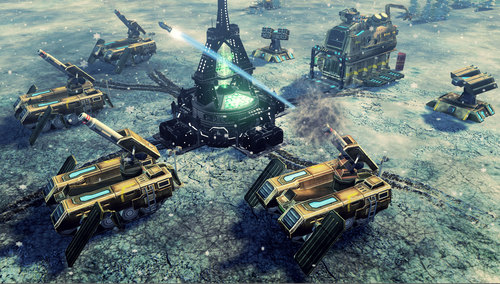 Ion Cannon
The Ion Cannon is the ultimate weapon in the GDI’s arsenal. Capable of inflicting large-scale devastation with extreme precision, the Ion Cannons are now configured to fire even whilst not yet fully charged.
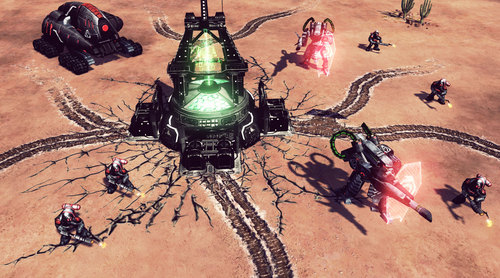 Centurion
The Centurion is a scaled-down version of the Avatar Warmech, designed primarily for territorial defence. Its cannon arm is designed to pierce tank armour, and its shield can block and even deflect enemy fire! Although very powerful when attacked head-on, the Centurion is extremely vulnerable from the sides.
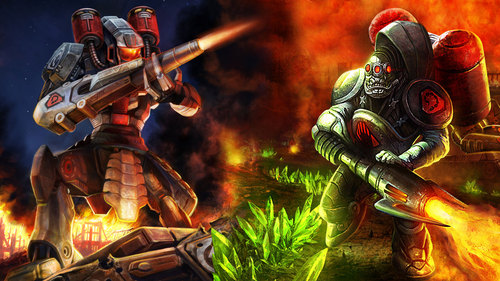 Black Hand The Black Hand is one of Nod’s most powerful units, capable of incinerating even a Crawler. Armed with powerful new flamethrowers, the Black Hand excels at destroying structures and creating firestorms, but it can also use its ‘Holy Water’ to create a cloud of volatile vapours which it can detonate with a single burst of flame.Reckoner The Reckoner is Nod’s troop transport, designed to carry Cyborg infantry to the front lines. Infantry can fire whilst the Transport is deployed, and the Reckoner can be upgraded to give it the ability to dig.Obelisk of Light
The venerable Obelisk of Light is the most famous structure in Nod’s defences. Perfectly capable of piercing even the Mastodon’s armour, the obelisks can now support one another by directing their beams towards a single obelisk, which can fire an extremely powerful amplified laser.
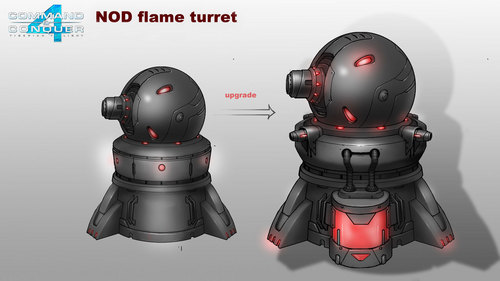
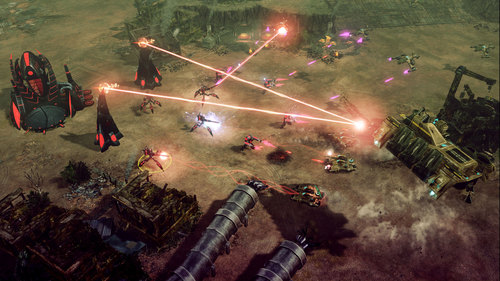 Pillar of Flame
Designed to operate in tandem with Black Hand infantry, the Column of Flames can inflict significant damage on ground units within its range. Armed with a long-range launcher for incendiary ballistic bombs and upgradeable with four large flamethrowers, the Pillar of Flames can hold its own against any ground invasion force.
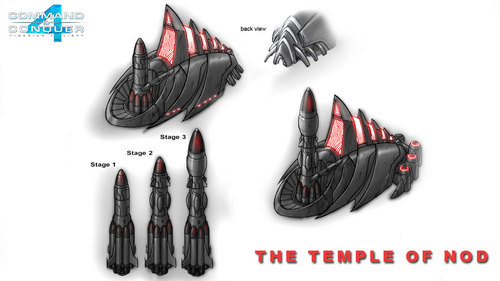
 Temple of Nod The most feared weapon in Nod’s arsenal, the Temple of Nod is both a holy site and a weapon of war. Armed with powerful Tiberium missiles, this sacred Nod structure can wipe out an entire army with a Stage 3 missile (when fully upgraded), but can also fire at Stage 1 or 2 if necessary.
 ### BETA UPLINK SERIES PART 4: Support Class
With the Support class, not only can you fight in the skies, but you also have access to a wealth of support abilities to aid your teammates or annihilate the enemy.
Support class players can rapidly deploy their forces onto the battlefield to assist their allies using fast aircraft, support abilities and devastating airstrikes. Whilst the Support class is very fast, many of its units lack sufficient armour to stand up to enemy forces as easily as the Attack class. However, advancing to Tier 3 will grant you access to the GDI’s powerful Kodiak or Nod’s Leviathan – slow-moving nightmares in the sky. The Support class’s abilities, which consume support points, come into play during the match in three different ways: reinforcing Allies, weakening the enemy and repairing damage. The Support class has more than one trick up its sleeve, offering countless strategies to anyone who can master this class. Play as a Field Medic and heal your teammates, build Firehawks and bomb your enemies… – the possibilities are endless.Tips for the Support class:
¤ Whilst the Support class cannot capture TCN nodes with air units, you can quickly traverse the map to neutralise the enemy andprevent them from controlling other TCN nodes, thereby stopping your opponent from earning victory points.
¤ Keep an eye on the alerts on the mini-map! Watch out for when your allies need help and react quickly. Support-class players can turn the tide of a battle very quickly, but they must work closely with their teammates.
¤ Aircraft such as the GDI’s Firehawk recharge much faster if they are within the Crawler’s range. Position your Crawler as close as possible to combat zones to get the most out of your bombardment units.
¤ Teamwork will earn you more support points. Prioritise helping your teammates rather than going off on your own to fight an opponent.
¤ YOU, as a Support-class player, are the only one with access to support abilities. Get to know them well and master them to become a force to be reckoned with.
Orca
At first glance, the Orca MK V is very similar to its predecessors – a sleek and agile vertical take-off aircraft that combines the manoeuvrability and Drone Armor of its cousin, the Hammerhead, with the ability to traverse the battlefield more quickly than a more traditional fixed-wing aircraft. Under the bonnet, however, the improvements have been considerable: notably, better manoeuvrability and an upgrade to its vertical thrust system, which allows the Orca to fly in reverse, albeit at a slightly slower pace than when flying forwards.
 Kodiak
The Kodiak is a Titan of the skies. Modelled on the Kodiak from the Second Tiberium War, these new vessels are not command ships, but powerful weapons of war. Instantly recognised by the Brotherhood as a force to be reckoned with, this vessel features three Artillery Turrets capable of firing at ground targets, making it particularly effective against structures or clusters of units. The Kodiaks are also armed with gun turrets along their deck to protect them from enemy aircraft.
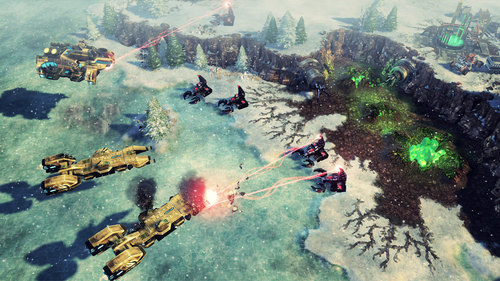 Sonic Artillery
This artillery salvo fires 4 powerful sonic shells at the selected area. Each shell temporarily incapacitates enemy units in the area. Using this ability allows your attacking units and those of your allies to attack these defenceless units.
Seismic Disturbance
GDI taps into the Tiberium control network to create seismic disturbances and trigger an earthquake, reducing the speed and evasion of all enemy units, as well as all underground and Shadow Team units. Whilst the earthquake is active, enemy units cannot burrow. However, this ability does not affect air units.
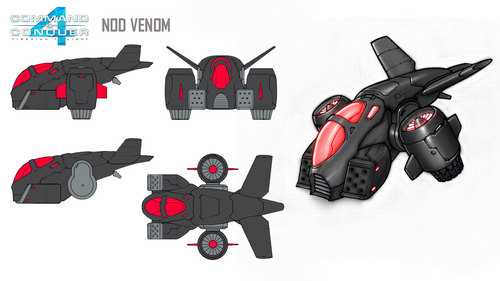
Venom
The use of Venoms became very popular following the Third Tiberium War, with Nod’s rebel forces using them to launch rapid attacks on TCN nodes around the globe. Their lightweight design, rapid production time and speed make them one of the fastest aircraft on the battlefield.
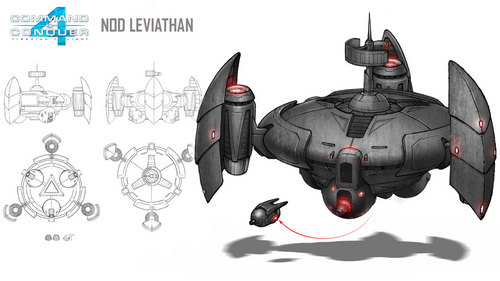
 Leviathan
The Leviathan rains fire down upon its enemies. This beast is equipped with three fireball launchers that can incinerate ground units unfortunate enough to be within the Leviathan’s shade. When upgraded, the Leviathan can also strike with a drone, a small, manoeuvrable fighter that can operate without putting the Leviathan at risk.
 Risen Monolith
This Tier 4 ability allows you to deploy this powerful Mega-Obelisk at a location of your choice. It is capable of dealing heavy damage to heavy units and can also link up with a network of Obelisks of Light, thereby boosting the firepower of the others.
Underground Attack
This ability creates several large holes in the ground, dealing damage to surrounding units. Although limited to ground-based targets, few players will be able to predict where and when you’ll pull the ground out from under their feet.
BETA UPLINK SERIES PART 5: Tiberium
Command & Conquer 4 is a faster-paced game than previous titles in the Tiberium Saga, and the way Tiberium is harvested has also been completely overhauled. In C&C4, the Tiberium Control Network has been developed using Kane’s knowledge of Tiberium and the GDI’s extensive resources. The GDI-Nod Alliance has created the TCN to harness Tiberium and prevent it from destroying humanity, but the alliance will soon be put to the test. As the GDI and Nod forces stand on the brink of the Fourth Tiberium War, the need to control the mysterious crystal in order to upgrade their weapons and units has become a major concern for all Commanders.
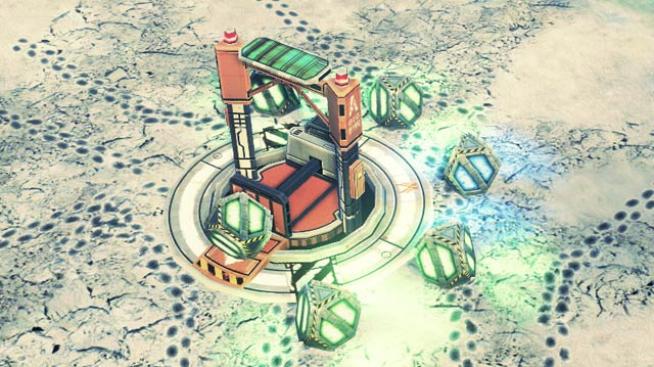
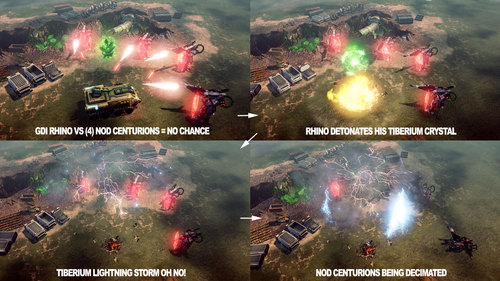
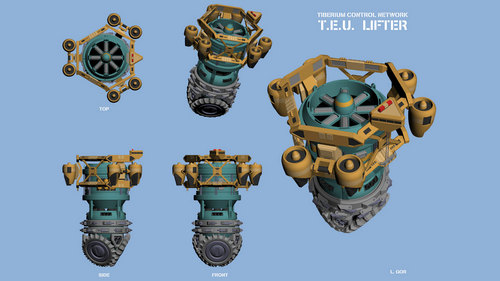
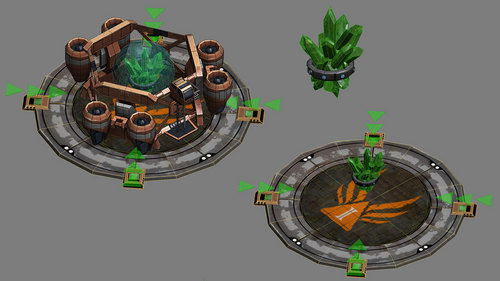 During matches in the 5v5 Domination mode, the TCN collects and transports Tiberium crystals from the battlefield to specific zones. These crystals can be collected by any ground unit in the game without any special equipment – no need to build harvesters! The crystals must then be carried to the team’s zone or to an Uplink tower captured by the team, and each team member receives 1 upgrade point. Blue Tiberium crystals are rarer than green ones, and are worth 2 upgrade points. Whilst you are carrying a crystal back to your zone, the enemy can destroy your unit and steal the crystal; to prevent it from falling into enemy hands, the unit carrying the crystal can detonate it, creating an ion storm in the area that will seriously damage all nearby units. You can use this feature to your advantage by driving a crystal straight into enemy lines and detonating it to cause significant damage!
 A short time after the crystal has been retrieved from its delivery zone, the collection platform will bring another crystal. All upgrades in C&C4 cost upgrade points, including the upgrades to levels 2 and 3, which grant access to more powerful units (5 upgrade points are required for Tier 2, and a further 7 for Tier 3). Upgrades are essential for your team’s victory, so make sure one team member is responsible for harvesting Tiberium. Nothing is worse than having GDI Kodiaks bombarding your base when all you have to defend yourselves with are Attack Cycles (Tier 1)!
 Tips for collecting Tiberium:
¤ At the start of the match, it’s essential to send a fast Tier 1 unit to collect the Tiberium Crystals on the map. The enemy will do the same, so make sure you coordinate with your team and decide who will handle the crystals during the 10-second ‘planning’ phase at the start of the game. Units move more slowly when carrying a crystal, so be sure to choose the best unit at the start of the game!
¤ Units move more slowly whilst carrying Tiberium, and the enemy will try to take advantage of this. Make sure you have support from Support-class players to heal your Harvester if necessary.
¤ Not everyone on the team needs to be involved in collecting crystals. Coordinate with your team and decide who will take on this task.
¤ If the enemy attacks your Harvester, make sure you detonate the Tiberium. If you let your unit be destroyed, the enemy can capture your crystal for their own use!
¤ The mini-map will alert players when and where crystals appear, so don’t forget to keep an eye on it.
BETA UPLINK SERIES PART 6: Tier 3 Units
Command & Conquer 4 features more units than any previous C&C game. Tier 3 units are capable of defeating any opponent foolish enough to stand in their way. Spanning the three classes (Attack, Defence and Support), we’ll be looking at a large number of GDI and Nod Tier 3 units this week.
GDI Tier 3 Units
Mammoth Tank
The backbone of any GDI strike force, The Mammoth Tank returns with its two powerful cannons and rocket launchers. The Mammoth is a veritable shield that can lead a group of Mastodons and absorb a great deal of damage whilst destroying everything in its path. Upgrading it can increase its protection against Mini-Guns and Laser Turrets, and more powerful cannons can be unlocked via an upgrade crate.
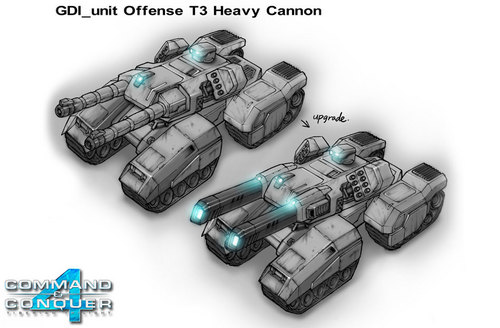 Tip: It’s wise to place your Mammoth Tanks on the front line of your force. They have a ‘Taunt’ laser that forces enemy forces to attack them rather than the rest of your units. Repair your Mammoth Tanks at the same time before the enemy destroys them.
Refractor
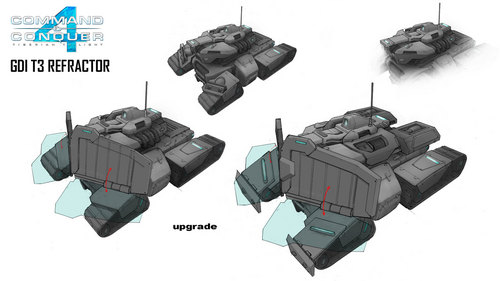
This Heavy Tank is fitted with a front-facing mirror capable of reflecting a large amount of damage back at enemy units. It can also open fire with a powerful Laser Turret, making this vehicle doubly formidable: you won’t want to mess with it! When upgraded, its mirror becomes even more effective.
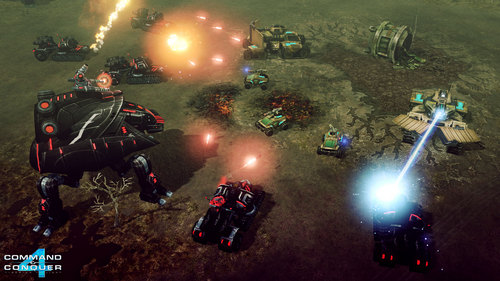 Tip: Deploy your Refractors against some of Nod’s most formidable forces, such as the Avatar Warmech or the Widow. The enemy’s firepower will be reflected back at them, causing serious damage.
 Juggernaut
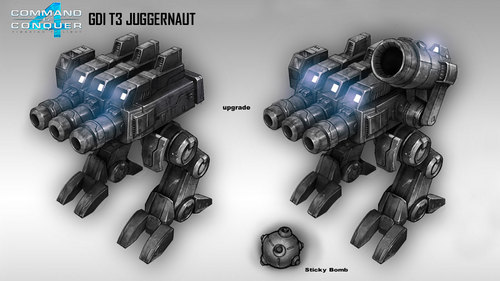
The Juggernaut is a mobile Artillery unit, capable of rapidly firing salvos of shells over long distances and withdrawing before the enemy can react. It can also be upgraded with ‘Sticky’ bombs – extremely powerful Land Mines that can be deployed in a distant area! However, ‘Sticky’ bombs are not camouflaged like other Land Mines!
Tip: The Juggernaut’s shells deal a great deal of damage to units near the impact points. Aim for the centre of a group of units to damage them all. Use distance to your advantage, as the Juggernaut has one of the longest ranges on the battlefield.
 Exo-Captain
Zone Captains lead the GDI’s new Zone forces. This heavily armoured infantry is capable of using a mobile Ion Cannon to decimate enemy forces from a distance! The Exo-Captain can also add an EMP effect to its attack, rendering units immobile for a short period.
Tip: After using the EMP on a large group of units, attack with the Zone Captain’s Ion Cannon or with Juggernauts!
 Thunderhead
This specialised vehicle can transform from a ground platform into an aircraft, making it highly versatile. However, it can only fire at units on the same level as itself! You can also land it directly on units to inflict serious damage on the enemy. The Thunderhead can fire at targets with a heavy Laser Turret that deals a large amount of damage.
Tip: When trying to counter an Attack player supported by a Support player, use your Thunderhead to destroy their aircraft and aerial healers, whilst your ground tanks such as the Hunter or Mammoths deal with the rest.
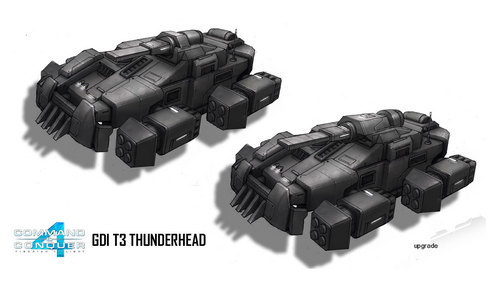 The GDI also still has plenty of powerful Tier 3 units such as the Mastodon, the Rhino, the Kodiak and the Archangel.
Noddies’ Tier 3 Units
Avatar Warmech
Recently redesigned in response to community feedback, the Avatar Warmech returns to battle for this 4th Tiberium War. The Avatar Warmech is now more of a threat to GDI forces than ever, armed with multiple cannons. Your only chance of defeating it is to destroy each of its cannons to reduce its firepower.
Tip: when destroyed, the Avatar Warmech leaves behind a wreckage. Hurry to capture it and turn the tide of battle!
Widow
The Widow is a terrifying unit on the battlefield. A massive destruction tank shaped like a giant spider, its Laser Turrets tear the enemy to pieces. Nod’s small ‘Spider Tanks’ can be built and attached to the Widow. Each Spider Tank added to the Widow increases its firepower. Spider Tanks can operate independently for rapid assaults, as the Widow’s movement speed is slower than that of these Level 1 demons.
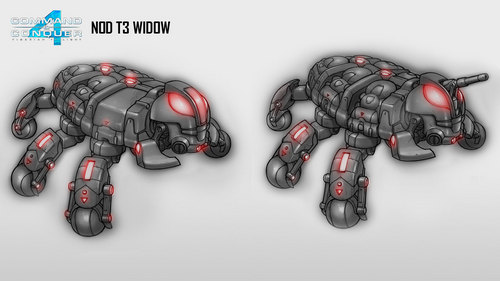 Tip: Spider Tanks will detach from the Widow when she is destroyed, allowing you to retain your attacking force.
 High Confessor
Nod’s Cyborg High Confessor is equipped with a medium-range anti-mass weapon. This weapon can chain-destroy groups of enemies by applying Corrosive Tiberium. This corrosion weakens the targeted unit, thereby reducing its effectiveness on the battlefield. The attack also deals damage over time to units if the enemy has no Support units to heal them. Tip: Order your High Confessor to attack, then send other units in to attack. As the corrosion continues to deal damage over time, you do not need to keep the High Confessor on the front line.
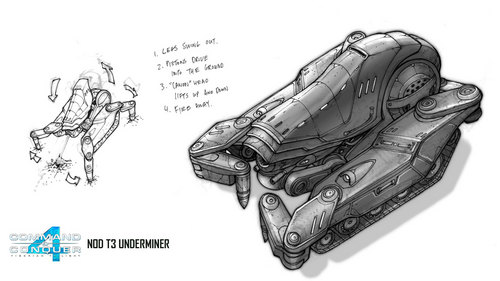
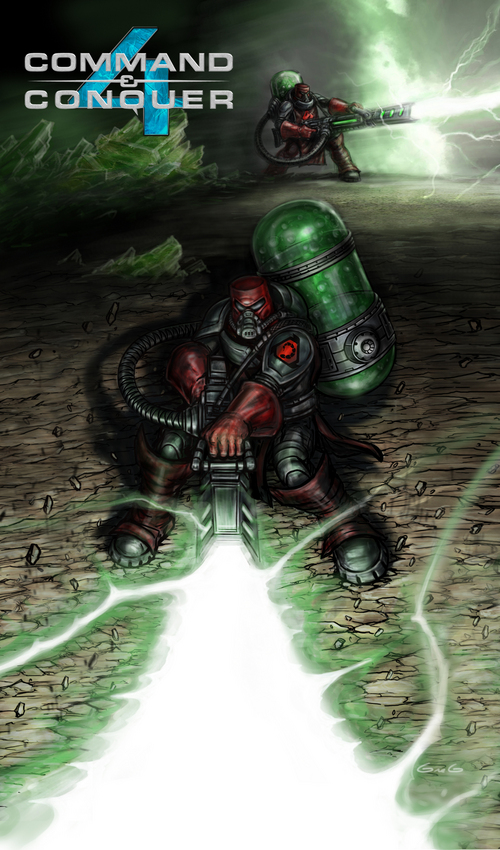 Underminer
This large, fearsome beast fires explosive projectiles through the underground tunnels over long distances – you won’t even see the attack coming! Primarily used to destroy enemy structures, Nod has utilised its technology to build this extremely effective unit. Keep an eye on your buried units, as the Underminer’s projectile will collide with any underground forces in its path!
Tip: It’s best to use the Underminer to destroy an area’s enemy defences before sending in your main army. The enemy will struggle to see where the attack is coming from, unless they have a detector.
 Leviathan
The Leviathan is a heavy Nod command ship equipped with three ground-targeted fireball launchers. As a support unit, it can increase the armour of a nearby allied unit thanks to its ‘Command Aura’.
Tip: If the Leviathan is attacked by small Tier 1 units, make sure to purchase the Leviathan upgrade; small drones will emerge around the vessel, allowing you to fend off a greater number of enemies.
Not mentioned above, but not to be taken lightly, Nod also has other Tier 3 units such as the Aftershock, the Basilisk and the Medusa.
BETA UPLINK SERIES PART 7: 5v5 Strategies
Here are 4 of the many 5v5 Domination maps that will be available in Command & Conquer 4! Discover each of our four environments below, along with development strategies:
- The green and blue Tiberium Crystals indicate the Indris Corporation’s crystal deposit sites. Harvesting these Tiberium Crystals will award upgrade points to your team;
- The red circles indicate the locations of the Tiberium Network Control Hubs (5 in total). Controlling more TCNs than the enemy will grant your team victory points. 2,500 victory points are needed to win a match;
- SPAWN represents the spawn zones for each team. Each emplacement has invulnerable defences to prevent enemy camping. Building units at spawn points is slightly faster than on the open field.
Ice Station Omega (Arctic)
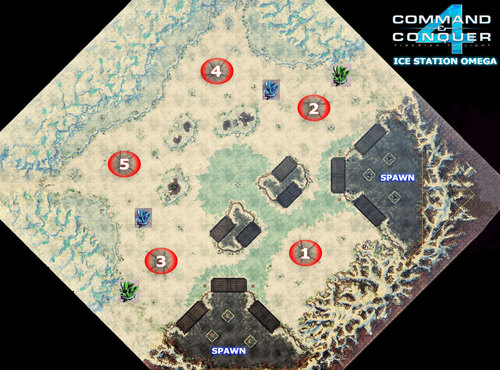 Due to the unusual positioning of the SPAWN zones, the Uplink Tower and TCN No. 1 are essential for countering the enemy and facilitating traffic flow.
Although each team originally has two Tiberium points, the team controlling the central Power Plant (and therefore a spawn point further forward) can threaten the enemy’s Tiberium harvesters.
It is essential to capture the Uplink Towers on the opposite side of the map. Failure to do so will result in very long reinforcement times.
Be wary and do not place too much importance on the centre. Whilst it restricts enemy movement, it does not offer you any victory points.
Searing Mesa (Desert)
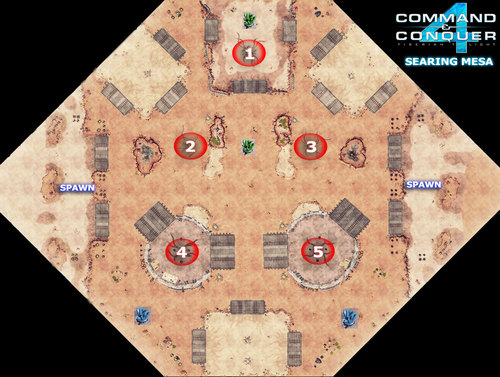 The two southern Tiberium nodes have only two access points, making them prime positions for defence-oriented players. Used wisely, they can also help control the blue crystals; if a Defensive Crawler is near the southern cliff, it can create Turrets below to help block the access routes. The Defence class can build at different altitudes and close to their Crawler.
Each team has a Tunnel Network connecting the north to the south and the edges of the map. Use these structures, with the help of Allied Forces, to control the Uplink Tower and/or the Turret at the southern tip of the map, or in the battle for the green Tiberium Crystal and the TCN node in the northern part of the map. Bear in mind that each Tunnel Network is located near an Uplink Tower to reduce the time taken for reinforcements to arrive.
The North TCN No. 1 is arguably the most valuable, as it is easy to defend both the node and the green crystal generated there. Unlike other maps, there are no relatively ‘safe’ positions for the Tiberium Crystals on Searing Mesa. Although there is one additional blue Tiberium Crystal, and one near each spawn zone, these can easily be controlled by the opposing team provided they control the southern Uplink Tower.
Afflicted Arena (Polynesia)
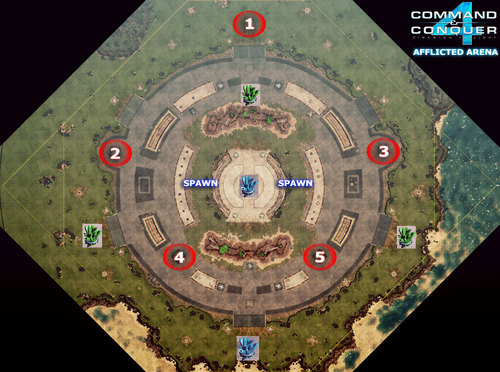 Afflicted Arena is unique because the spawn zones are in the centre of the map and all the points of interest are on the outer edge. This makes the map very wide and more difficult to manoeuvre around.
The centre, despite its blue Tiberium Crystals, is not as important as the ring around the map. Be careful not to linger there gathering too many resources, as the blue crystal only appears once a minute.
Tech structures are key on this map. Controlling the Uplink Towers and the Artillery Turret can hamper your opponent’s manoeuvrability.
TCN No. 1 can be contested by both teams, but is a long way from the spawn. Bear in mind that sending reinforcements there will leave you very vulnerable elsewhere.
Lost Valley (Junktown)
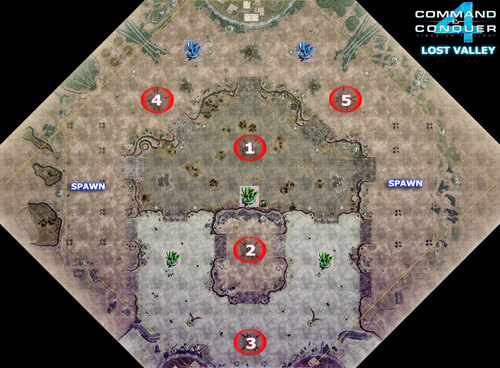 The east-west cliffs, which run from the centre to the bottom of the map, effectively divide the map into northern and southern zones. Controlling both checkpoints can almost guarantee control of half the map.
The northern half of the map is largely secure, with both teams most likely to secure their TCN and the blue Tiberium crystal, before sending reinforcements to fight for TCN number 1.
As for TCNs 2 and 3, controlling the Mutant Hovel will be extremely useful for dictating the pace of the action, to the extent that the whole team can instantly spawn reinforcements if needed.
Keep an eye on the green crystals in the southern half of the map. Most reinforcements will need to be escorted to the battle, as a cunning Commander could blow them up if your army isn’t on its guard.