Protect your base

The following article was written by an experienced player (by ‘experienced’ I mean a player who has played hundreds of thousands of games and understands the mechanics of the game) of Red Alert: A Path Beyond. The aim of this article is to provide you with some tips so that you can defend your base during an online or network game against both experienced and inexperienced human players. It is by no means definitive and may vary depending on the situation, the maps and the players you face. This article focuses on the Beta version of APB and may no longer be relevant once the Gamma version is released.
- Why protect your base?
Because the aim of the game is to destroy the enemy’s base, so if the enemy destroys your base, you’ll lose the game! However, as the best defence is a good offence, protecting the base with as few troops as possible will allow you to attack more effectively. This article will show you that, in most cases, it is possible to protect a base on your own if you know how to go about it.
- Repairing: the key to defence
In APB, Technicians and Engineers can only repair buildings, not vehicles. However, they remain important for defence as they can repair all damaged buildings, including defences. Note that the repair tool restores minor defences (anti-aircraft guns, flame towers, pillboxes and Turrets) very slowly, so it’s best to use the Engineer’s Golden Wrench (where possible) to repair them. When a building is under attack, it is crucial to have at least one person repairing it from the inside. If there is no one there, seize this opportunity. Repairing earns a lot of points and often prevents you from losing a building. Although the Construction Yard repairs other buildings, its regeneration rate is slower than when you repair them yourself. To repair a building, stand inside it in front of the computer labelled ‘Master Control Terminal’ (inherited from Renegade). In cases of extreme emergency, when the building has almost no health bar left, buy an Engineer and use the Golden Wrench tool on the Master Control Terminal. The building will be fully repaired if your intervention is successful.

- Flares and C4
Whilst the Golden Wrench is useful for emergency repairs, it is even more so for defusing flares and C4. In fact, it can instantly neutralise them if used close enough! On maps featuring Missile Silos, you can purchase and deploy signal flares to launch nuclear strikes. The Nuclear Missile Strike is much more powerful than in Renegade and is capable of destroying an entire base if positioned in the right place, so it must not be underestimated. When you hear the warning ‘Warning, Signal Flare detected’, a star will appear on your radar at the flare’s Emplacement and the sky will turn red. If the flare is inside your base, you must do everything you can to defuse it before the missile arrives. You don’t have much time. You’ll need to take an Engineer and use the Golden Wrench if you want any chance of defusing the flare in time. Defusing a beacon earns you a lot of points, but it’s a tricky operation, as the beacon is often guarded by the person who activated it.


- Land Mines
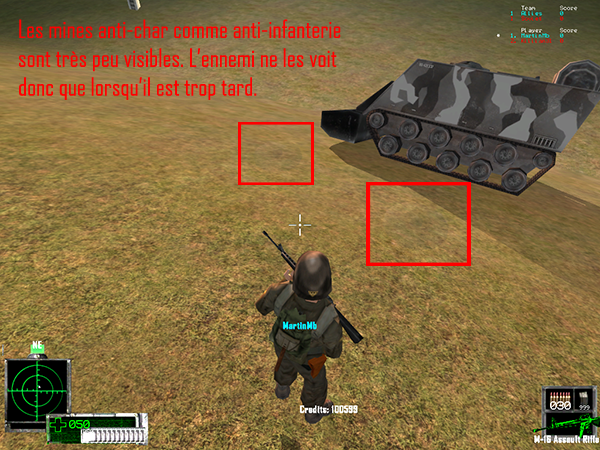
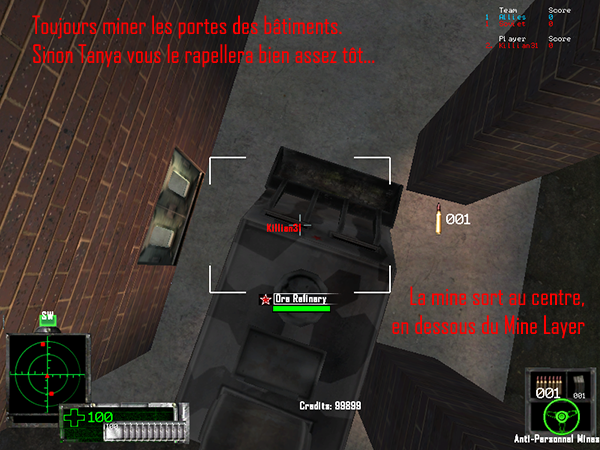
Land Mines are a formidable defensive tool and can form the mainstay of your defence if used correctly. To lay land mines, you’ll need to obtain a Mine Layer from the War Factory. This unit carries 5 Land Mines, which will be laid directly beneath the centre of your Mine Layer when you click, and can be reloaded at the base’s Service Depot. There is a limit on the number of Land Mines, which varies depending on the map, so if your Mine Layer refuses to lay its Land Mines, it is because the limit has been reached. Note that the Soviets have anti-personnel mines and the Allies have anti-tank mines. Stealing an enemy Mine Layer will not give you access to a different type of mine. With two types of mines come two different strategies. With the Soviets, prioritise mining the entrances to buildings and the interior of the Construction Yard. This is usually where thieves and Tanyas pass through to carry out their dirty work inside your buildings. If you kill someone with your Land Mines, quickly lay new ones at the spot that was targeted. For the Allies, who have anti-tank mines, you should prioritise mining the roads. Try not to be seen, as the enemy will realise there are Land Mines and will fire at the ground to detonate them. A single Land Mine is enough to cause massive damage to a Mammoth Tank and destroy any other type of vehicle in one go.
- Defensive units
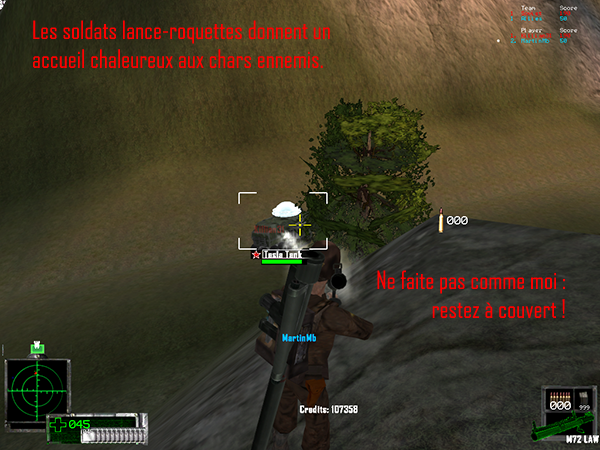
When the base is overwhelmed by a flood of enemy units or when the defences are destroyed, you’ll need to deploy units to defend it. Naturally, Engineers and Technicians remain the defence units of choice for both sides.Among the Allies, Rocket Soldiers are recognised as the best defenders amongst the infantry due to their effectiveness against tanks. Snipers are the next best option on certain maps when the base is under attack from heavy infantry (Volkov, Shock Troopers). Effective Allied vehicles for defence include, in particular, concealed Artillery, Mobile Gap Generators for their ability to block the enemy’s line of sight, and Medium Tanks capable of effectively combating Heavy Soviet armour. Defending an Allied base requires a cool head and good coordination, as you’ll have to deal with units twice as powerful as your own. Against the Soviets, focus on using fast units such as the Tesla Tank and infantry, as the Allies tend to attack with versatile units. Early in the game, however, you’ll have no choice but to use Heavy Tanks to defend effectively, given the cost of other units. Anti-personnel Land Mines are crucial in a Soviet base, so purchase a Mine Layer as soon as you get the chance. V2 rockets can be excellent for defence in the hands of an experienced player, as they are capable of destroying enemy vehicles from a great distance. As for infantry, Volkov and the Shock Troopers can easily outclass most attackers.
- Defend your resources!
This is particularly true for the Soviets, who, surprisingly, have their ore fields exposed to rushes on almost every map. On maps where ore payments are worth 700 credits, expect the Allies to harass your Ore Truck with Light Tanks to prevent you from receiving your second payment. In local network games, this is a real problem, as you cannot share your money with your teammates, but online, you can use the !donate command to distribute the credits needed to buy a tank. If you’re stuck with 700 credits and the enemy is rushing your harvester, buy a V2 to at least try to destroy the attackers from a distance.
Defending a base varies enormously depending on the map being played. This article wouldn’t be complete if I didn’t give you a few examples of the most challenging maps to defend. Note that in the following strategies, I’ll show you how to defend a base on your own, but the situation may vary if there are several of you defending.
- Classic Zama
Classic Zama is a map featuring Missile Silos and advanced defences. The Allies are in a vulnerable position, but possess a Gap Generator that camouflages their base. The Soviet base is situated on high ground and protected by a Tesla Coil and a wall. The bridge between the two bases usually falls very quickly, as the Allied turrets are mindless and will fire at it as soon as a Soviet Soldier steps onto it. The strategy you adopt depends on which side you’re on.
8.a. Classic Zama, Soviets
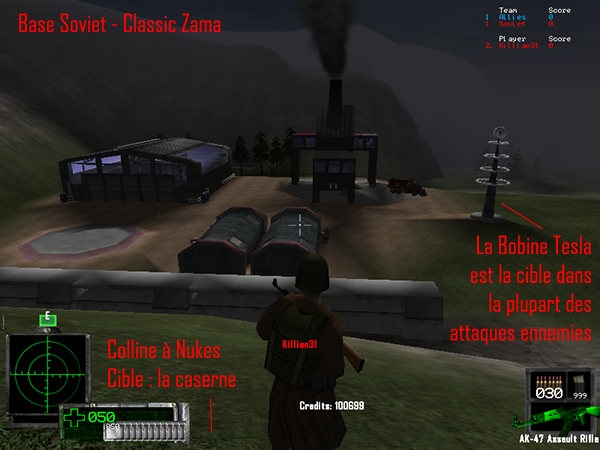
It is very important that the bridge falls before the first credit payout; otherwise, the Allies will rush forward with Light Tanks. During the first payout, you’ll have 700 credits and most of your comrades will buy V2s to bombard the enemy base. If you follow suit, prioritise targeting the Allied war factory to the left of the Gap bubble. As soon as the second credit payout arrives, immediately acquire a Mine Layer and lay Land Mines on the hill near the Caserne, at the bottom of the embankment in front of the Tesla Coil and, of course, at the entrances to each building. The Allies don’t have many options on this map, and their priority will be to destroy the Tesla Coil, which is preventing them from acting. They will plant atomic beacons in three main locations: the hill by the Service Depot, the bottom of the embankment in front of the Tesla Coil, and the pipe inside the war factory (using a Spy). You must be ready to act very quickly: buy a Tesla Tank and an Engineer. The Engineer will allow you to defuse any potential beacons, and the Tesla Tank can eliminate most of the threats lurking near your base. Almost all attacks will come from the hill overlooking your base.
8.b. Classic Zama, Allies
As mentioned earlier, you’re at a disadvantage here: you risk losing your War Factory very early on to the enemy’s numerous V2s. Protect it at all costs by buying several Engineers in quick succession if necessary. The Gap Generator is a major advantage for your team, so it must also be kept intact. The Soviets will attack throughout the game with two deadly weapons: M.A.D. tanks and V2s. A large number of M.A.D. tanks can raze your base without you being able to do anything about it, so destroy them at all costs before they detonate. Rocket Soldiers and Snipers are key to your defence here, especially if the War Factory has fallen early in the game. This map is also perfect for anti-tank Land Mines, so lay as many as possible without being spotted. The Soviets will mainly plant nuclear beacons in two locations: on the hill behind the war factory and on the plateau right in the middle of your base near the Gap. If the beacon is placed behind your war factory, it will probably be guarded by a Volkov. If this is the case, launch a surprise attack by using the Gap Generator to your advantage. A Soviet unit might plant a beacon in your base and use a Mammoth Tank to cover it; if this happens, the only solution is to overwhelm him by working as a team to destroy him and quickly defuse the beacon.

- Keep Off The Grass
This map is one of the most balanced and most frequently played in APB. The strategic opportunities are very varied, and you need to know how to defend your base to win here. The map consists of high hills with a field of precious stones in the centre, protected by walls. Each base has an access point that is better guarded than the other, and a weak spot to exploit. The hills will be used by the Volkovs and the Allied Snipers respectively to attack the enemy base. Strategy is key for both sides.
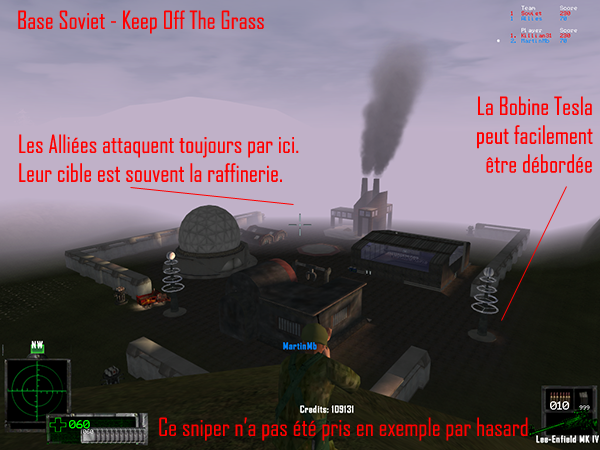
You’ll have a relatively easier time at the start of the game than on most maps, because the Allies almost never attack the Ore Truck. Instead, they’ll either rush the Tesla Coil, take Artillery to attack the Construction Yard, or rush the Tiberium Refinery by flanking your base. You’ll have two options for defence: take an Engineer and camp out at the building they’re going to attack, or take a V2 and take them out with heavy missiles. Mining your base is absolutely crucial on this map, as the Allies won’t hesitate to use Tanya. Place mines everywhere, but especially around the Tiberium Refinery. Make extensive use of anti-personnel mines, particularly if the Tesla Coils have been destroyed.
9.b. KOTG, Allies
Early in the game, a few Soviet kamikaze units might rush towards the Turret on the other side of the Construction Yard wall to destroy it. Keep an eye on this area; it will always be the first to fall during enemy attacks. On this map, you can use anti-tank Land Mines without being spotted, but watch out for the Volkovs lurking on the hilltops. To deal with them should they attack your base, use a Sniper – just as your teammates are likely to do. The Soviets will use a lot of tanks to attack your base via the Construction Yard, but this must hold at all costs! If the Soviets are unable to destroy the Construction Yard, they’ll fall back on another building. Prevent this by quickly destroying the attacking forces and prioritising the V2s, as they have the greatest destructive potential. As on Zama, a M.A.D. rush could wipe out your base, so mine the hills overlooking your base and keep your eyes peeled.

- Ridge War
For my final example, I’ve chosen Ridge War, which is another highly strategic map that’s tricky to defend. As the Soviets are right at the bottom, they’re in a weak position, but they receive 1,050-credit bonuses to compensate. Aircraft are available, and that’s what makes this map so much fun. Note that the defences are poorly placed on this map, so both bases have plenty of weak spots.
10.a. Ridge War, Soviets
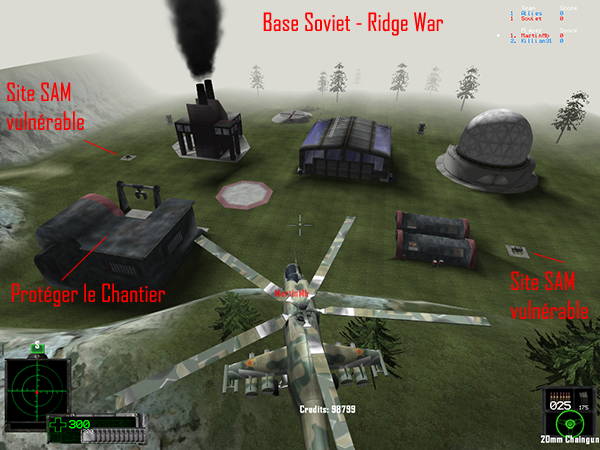
You’re in a vulnerable position. If you defend your base poorly, you’ll lose – that’s a certainty. Early in the game, the Allies will attack with plenty of fast vehicles. Their targets will be the Construction Yard, the Barracks and the Ore Truck, but you’ll have access to Shock Troopers and Heavy Tanks to meet them head-on. Once the rush has been wiped out, say hello to Tanya. You must mine all entrances and buildings – this is very important – but above all, you must replace any mines that are destroyed throughout the game. The Allies use a wide variety of strategies to attack the Soviet base on this map, ranging from mobile Radar Jammers (!!!) to Demolition Trucks covered by a Mobile Gap Generator. To spot these attacks coming from a distance, use a Hind helicopter as a defender. You’ll be able to pursue the Tanyas, spot the Demolition Trucks and harass the attacking tanks.
10.b. Ridge War, Allies
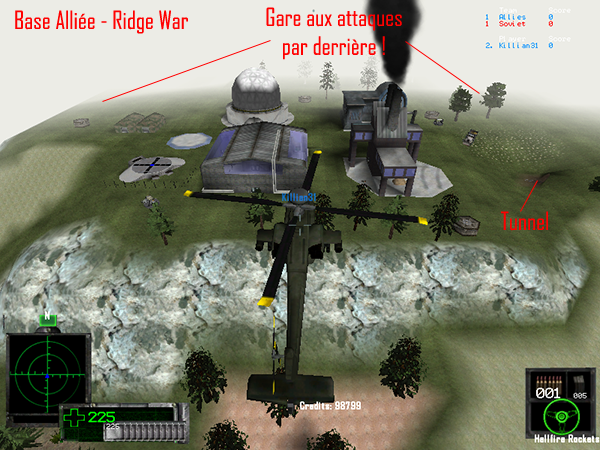
As the Soviets are in a weak position, they too will use a wide variety of units to attack your base. Helicopters are excellent defenders here as well, as they have a long range of vision and can destroy enemy armoured vehicles attacking your base from all sides. There are only two access ramps to your base, so mining them is an excellent idea. Don’t let the enemy operate behind your base, especially as helicopters can reach that area very easily. This is a formidable map for Chinook Transport rushes loaded with Shock Troopers. Early in the game, the Tiberium Refinery will be the main target for hordes of Heavy Tanks, so make sure you repair it. Tanya will be very useful for taking out infantry. I’d recommend either the Rocket-APC combo or the Tanya-Longbow combo for defence, as they can attack vehicles, infantry, aircraft and tanks alike. Keep an eye out for V2s and Tesla Tanks, as they’re quite fast and pack a powerful punch.